
A home is defined as much by the surfaces people touch every day as by the systems hidden behind its walls. Counters absorb spills and heat, entries swing open hundreds of times a week, paved approaches carry the weight of vehicles in every kind of weather, and the landscape frames it all from the street. Each of these elements faces its own form of wear, from abrasion and staining to settling, rot, corrosion, and the slow persistence of insects and roots looking for shelter and moisture. Together, they shape not only how a property looks but how well it holds up over time.
Caring for a home from the inside out means paying attention to both the visible and the concealed. Interior finishes protect the substrates beneath them, mechanical equipment keeps living spaces comfortable and supplied, and the exterior shell and grounds shield everything from rain, heat, and pests. Neglect in any one area invites damage that spreads into the next, while steady maintenance and thoughtful upgrades keep every surface, system, and structure performing as intended, preserving comfort, safety, and value for many years.
Templating Stone Slabs and Sealing Porous Surfaces

Work surfaces in the busiest room of the house take constant punishment. Granite and marble are naturally porous, absorbing cooking oils, wine, and coffee that leave dark stains beneath the surface. Acidic foods etch marble’s calcium carbonate, dulling its polish. Seams that were poorly filled collect grime, overhangs without proper support crack under weight, and water seeping around sink cutouts swells particleboard cabinet tops, loosening the entire installation. Heat from pots set directly on the surface can also cause thermal shock cracks in stone that was never supported properly.
A durable kitchen countertop starts with digital laser templating that captures every wall irregularity and cabinet dimension precisely. Fabricators cut slabs on CNC equipment, positioning seams over solid cabinet support and bonding them with color-matched epoxy. Overhangs exceeding about ten inches receive concealed steel brackets, and undermount sinks are anchored with clips and structural adhesive. Natural stone then receives an impregnating sealer that should be renewed whenever water stops beading on the surface, while engineered quartz offers a nonporous alternative. Backsplash joints are finished with flexible silicone rather than grout, so normal movement never opens a path for water.
Compacting Aggregate Base and Resurfacing Cracked Pavement
Paved surfaces fail from the bottom up. When the subgrade is soft or the aggregate base too thin, the weight of vehicles flexes the surface until it develops a web of alligator cracks. Water seeps through those openings, saturates the base, and freezes in cold weather, expanding and breaking the pavement into potholes. Nearby roots heave sections upward, poor slope leaves standing water, and leaking oil softens asphalt binders. Edges without proper support crumble first, especially where tires repeatedly roll off the pavement onto soft soil.
An experienced driveway contractor removes failed sections down to stable soil, lays geotextile fabric to separate the subgrade from the base, and installs six to eight inches of crushed aggregate compacted in lifts with a vibratory roller. A fresh course of hot-mix asphalt is then placed and rolled to the proper density and pitched to shed water toward the edges. Routine crack sealing with hot-pour rubberized compound and sealcoating every few years protect the surface from moisture and UV damage. Compacted edges and a trench drain at the garage apron complete a surface built to carry vehicles for decades.
Blocking Pest Entry Points and Treating Termite Galleries
Pests take advantage of the smallest gaps in a home’s defenses. Mice slip through openings about a quarter inch wide, while rats need only a half inch, entering through utility penetrations, foundation cracks, and gaps beneath siding. Once inside, they gnaw wiring, contaminate insulation, and nest in wall cavities. Subterranean termites present a quieter threat, building mud tubes up foundation walls and hollowing out sill plates and floor joists, often causing extensive structural damage before any sign appears.
Professional exterminating companies begin with a full inspection, then seal entry points with copper mesh, sealant, and hardware cloth over vents and crawlspace openings. For termites, technicians trench and rod a non-repellent liquid termiticide around the foundation to create a continuous treated zone, or install a monitored bait system that colonies carry back to the nest. Active galleries inside wood can be injected with borate foam, and correcting moisture problems removes the conditions that attracted insects in the first place. Follow-up inspections each year confirm that the treated zone remains intact and that no new activity has started.
Rehanging Warped Panels and Replacing Worn Weatherstripping
Entries endure seasonal swings in humidity and temperature that warp wood panels and shift their fit within the frame. Hinge screws loosen in soft jamb wood, allowing panels to sag until they rub against the head or strike side. Latches stop catching, deadbolts bind, and gaps open along the edges. Worn weatherstripping flattens and cracks over time, letting drafts, water, insects, and noise slip inside while conditioned air leaks out.
Restoring sticking doors starts with replacing short hinge screws with three-inch screws that bite into the framing, pulling the panel back into alignment. Rubbing edges are planed and sealed with paint or finish to resist future swelling. Badly warped panels are replaced with insulated fiberglass or steel units that hold their shape. New kerf-in compression weatherstripping, a bottom sweep, and an adjustable threshold restore a tight, quiet seal against weather and pests. A properly adjusted strike plate then lets the latch and deadbolt engage smoothly without force.
Aligning Frameless Enclosures and Resealing Tempered Panes
Frameless bath enclosures look simple, but their performance depends on precise hardware alignment. Heavy tempered panes hang from hinges and clamps that loosen over time, causing the panel to sag, rub, or swing out of plumb. Seals and sweeps wear out, letting water escape onto the floor, while silicone joints break down and harbor mildew. Misalignment also concentrates stress on tempered edges, increasing the risk of sudden breakage.
Specialized glass shower door services start by checking hinges and clamps for wear and confirming that anchors are secured into studs or solid blocking. Technicians adjust or replace hinges to bring the panel back into plumb, install new clear vinyl sweeps and seals, and remove deteriorated silicone before applying fresh 100 percent silicone at each joint. A hydrophobic coating can then help water bead and sheet away, reducing hard water spotting and cleaning time. Routine squeegeeing after each use and a quick annual hardware check keep the enclosure watertight and safe.
Testing Relief Valves and Replacing Burned-Out Elements
Storage tanks depend on a temperature and pressure relief valve as their final safety device. Over years of mineral exposure, that valve can seize, leaving the tank without protection if a thermostat fails and pressure builds. A valve that drips constantly signals a different problem, usually excessive pressure or temperature inside the system. In electric units, heating elements develop scale and eventually burn out, leaving occupants with lukewarm supply and long recovery times.
Prompt water heater repairs include lifting the relief valve lever to confirm water flows freely and the valve reseats properly, replacing any valve that sticks or keeps dripping. The discharge pipe should terminate within six inches of the floor or drain. Technicians test elements with a multimeter, replace burned-out units with low-watt-density versions that resist scale, and verify thermostat settings. Adding an expansion tank helps control pressure spikes that strain the entire supply system. An annual flush to remove sediment and an inspection of the anode rod complete a maintenance routine that extends tank life by years.
Locating Refrigerant Leaks and Straightening Bent Condenser Fins
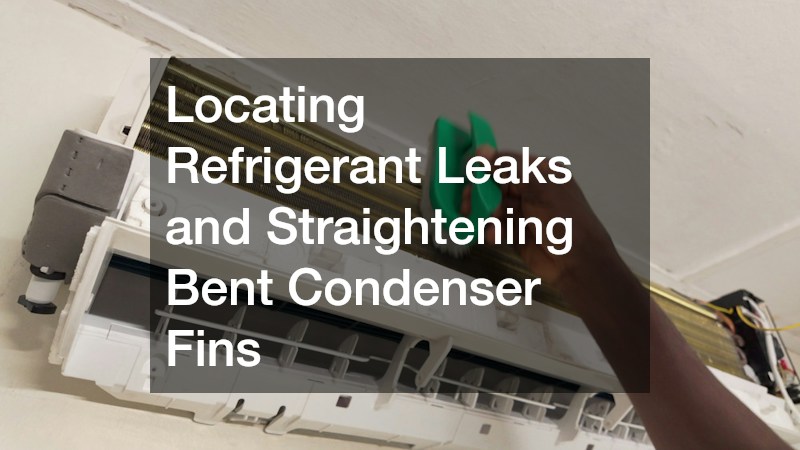
Cooling equipment loses performance quietly when refrigerant escapes through Schrader valve cores, flare fittings, or corroded coils. As the charge drops, the system runs longer, ices up, and struggles to remove humidity from the air. Outdoors, the condenser’s delicate aluminum fins bend easily from hail, lawn equipment, and careless cleaning. Flattened fins block airflow, raising head pressure and forcing the compressor to work harder and hotter.
A thorough ac repair begins with electronic leak detection, ultraviolet dye, or a standing nitrogen pressure test to pinpoint escaping refrigerant. Technicians repair the leak, pull a deep vacuum, and recharge by weight to the manufacturer’s specification. At the condenser, a fin comb straightens bent fins, coil cleaner removes embedded dirt, and surrounding plants are trimmed back to provide about two feet of clearance. A protective guard can help shield fins from future damage. Finally, technicians verify superheat, subcooling, and temperature split to confirm the system is cooling at full capacity.
Fertilizing Stressed Root Zones and Cabling Weak Unions
Mature shade specimens face constant stress in residential settings. Construction traffic and foot traffic compact soil, crushing the fine feeder roots that absorb water and nutrients. Drought, poor soil, and turf competition starve root systems, producing yellowing leaves, thin canopies, and dieback in the upper crown. Structurally, co-dominant stems joined by included bark form weak unions that can split apart under wind, snow, or ice loads.
A qualified tree care company starts with a soil test and root collar inspection, often using an air spade to excavate buried flares and loosen compacted soil without damaging roots. Deep-root fertilization with slow-release nutrients and a wide mulch ring then restore vigor. For weak unions, arborists install supplemental support following ANSI A300 standards, placing dynamic or steel cables about two-thirds of the distance from the union to the branch tips and adding bracing rods where needed. Follow-up visits every few years let arborists adjust hardware and prune selectively as the canopy continues to grow.
Fastening Lifted Shingles and Renewing Chimney Flashing
Wind gradually loosens shingles by breaking their adhesive seal strips, allowing tabs to flap and nails to work loose. Each storm drives water under lifted edges and toward the decking. Chimneys present another common source of leaks. Step flashing and counterflashing pull away from mortar joints as masonry settles and sealant dries out, letting water run down the brick into attic framing, insulation, and ceilings.
Skilled local roofers reseal lifted shingles with asphalt cement, replace backed-out fasteners with ring-shank nails, and swap damaged tabs for matching material. At the chimney, crews remove the old flashing and install new step flashing woven course by course with the shingles, topped by counterflashing set into reglets cut into the mortar joints. Chimneys wider than about 30 inches also receive a cricket to divert water around the uphill side. A final walk of the entire surface checks pipe boots, vents, and exposed nail heads so small leaks are caught before they reach the decking.
Mounting Seamless Channels and Routing Downspout Extensions

Undersized or poorly installed roof drainage systems overflow during heavy storms, sending water over the edge and straight down onto the foundation. Sectional channels leak at their seams, sagging runs hold standing water, and short downspouts dump concentrated flow beside basement walls. The result is eroded soil, saturated foundations, wet basements, rotted fascia boards, and staining across siding and walkways.
Proper gutter installation starts with seamless aluminum or steel formed on site in five- or six-inch profiles sized to roof area and rainfall intensity. Hidden hangers screw into the rafter tails about every 24 inches, and runs are pitched toward downspouts spaced every 30 to 40 feet. Extensions or buried PVC lines carry discharge several feet away from the foundation to pop-up emitters, splash blocks, or dry wells. Micro-mesh guards and a twice-yearly cleaning keep the channels flowing freely through leaf season and heavy spring storms.
Lasting Care From the Inside Out
Every part of a property contributes to its long-term health. Interior surfaces protect the cabinets and framing beneath them, mechanical systems keep the home comfortable and supplied, the shell shields the structure from weather, and the landscape and paved approaches frame it all while managing water and traffic. When maintenance lapses in one area, damage rarely stays contained. A small leak invites insects, poor drainage undermines pavement, and failing seals let moisture reach framing.
Consistent upkeep breaks that cycle. Resealing stone surfaces, checking mechanical safety devices, inspecting for insects and moisture, adjusting worn hardware, and clearing drainage paths take relatively little time compared with the cost of reacting to failures. Pairing routine care with quality materials and skilled workmanship extends the life of every component and keeps expenses predictable from one year to the next.
The result is a home that looks good and performs well from the busiest room inside to the edge of the street. Surfaces stay clean and sound, systems run efficiently, the shell remains watertight, and the grounds stay healthy and safe. That steady attention preserves comfort, protects property value, and gives owners confidence that their home is ready for whatever each season brings.